Red Hat EL Janssen Installation#
Before you install, check the VM system requirements.
Install the Package#
RHEL 9#
- Install EPEL and mod-auth-openidc as dependencies
sudo yum -y install https://dl.fedoraproject.org/pub/epel/epel-release-latest-9.noarch.rpm
sudo yum -y module enable mod_auth_openidc
- Download the release package from the GitHub Janssen Project Releases
wget https://github.com/JanssenProject/jans/releases/download/v2.0.0/jans-2.0.0-stable.el9.x86_64.rpm -P ~/
-
Verify the cryptographic signature using cosign (primary verification):
Note
Install the cosign CLI if not already installed.
-
Download the cosign bundle from the Releases page:
Commandwget https://github.com/JanssenProject/jans/releases/download/v2.0.0/jans-el9-2.0.0-stable.bundle -P ~/ -
Verify the signature:
Commandcosign verify-blob \ --bundle ~/jans-el9-2.0.0-stable.bundle \ --certificate-identity-regexp "https://github.com/JanssenProject/jans" \ --certificate-oidc-issuer https://token.actions.githubusercontent.com \ ~/jans-2.0.0-stable.el9.x86_64.rpmOutput similar to below confirms the package was signed by the Janssen CI pipeline:
OutputVerified OK
-
-
Optionally, verify integrity using the published checksum file (secondary check):
Commandwget https://github.com/JanssenProject/jans/releases/download/v2.0.0/jans-2.0.0-stable.el9.x86_64.rpm.sha256sum -P ~/ sha256sum -c jans-2.0.0-stable.el9.x86_64.rpm.sha256sumOutput similar to below should confirm the integrity of the downloaded package.
jans-2.0.0-stable.el9.x86_64.rpm: OK -
Install the package
sudo yum install ~/jans-2.0.0-stable.el9.x86_64.rpm
RHEL 10#
- Install EPEL and mod-auth-openidc as dependencies
sudo yum -y install https://dl.fedoraproject.org/pub/epel/epel-release-latest-10.noarch.rpm
sudo yum -y module enable mod_auth_openidc
- Download the release package from the GitHub Janssen Project Releases
wget https://github.com/JanssenProject/jans/releases/download/v2.0.0/jans-2.0.0-stable.el10.x86_64.rpm -P ~/
-
Verify the cryptographic signature using cosign (primary verification):
Note
Install the cosign CLI if not already installed.
-
Download the cosign bundle from the Releases page:
Commandwget https://github.com/JanssenProject/jans/releases/download/v2.0.0/jans-el10-2.0.0-stable.bundle -P ~/ -
Verify the signature:
Commandcosign verify-blob \ --bundle ~/jans-el10-2.0.0-stable.bundle \ --certificate-identity-regexp "https://github.com/JanssenProject/jans" \ --certificate-oidc-issuer https://token.actions.githubusercontent.com \ ~/jans-2.0.0-stable.el10.x86_64.rpmOutput similar to below confirms the package was signed by the Janssen CI pipeline:
OutputVerified OK
-
-
Optionally, verify integrity using the published checksum file (secondary check):
Commandwget https://github.com/JanssenProject/jans/releases/download/v2.0.0/jans-2.0.0-stable.el10.x86_64.rpm.sha256sum -P ~/ sha256sum -c jans-2.0.0-stable.el10.x86_64.rpm.sha256sumOutput similar to below should confirm the integrity of the downloaded package.
jans-2.0.0-stable.el10.x86_64.rpm: OK -
Install the package
sudo yum install ~/jans-2.0.0-stable.el10.x86_64.rpm
Run the setup script#
- Run the setup script in interactive mode:
sudo python3 /opt/jans/jans-setup/setup.py
The installer should confirm successful installation with a message similar to the one shown below:
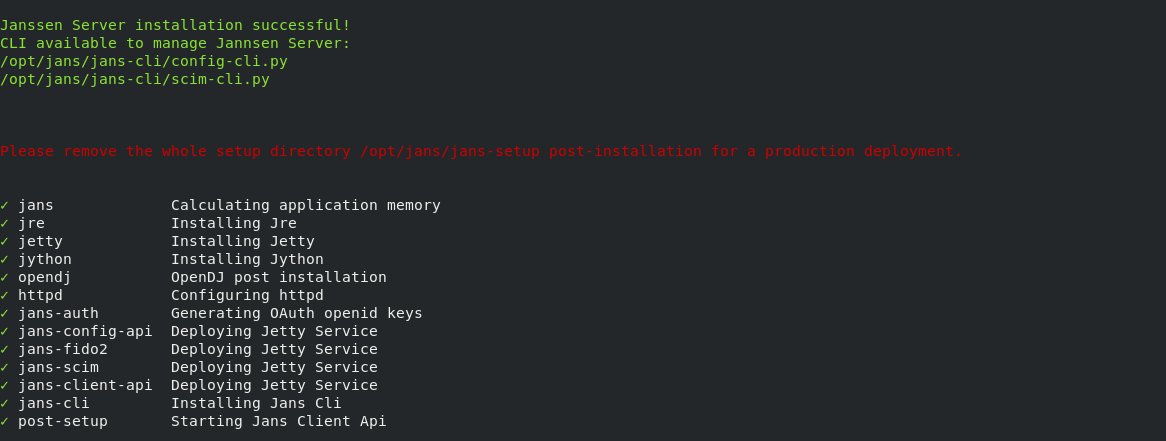
See more detailed instructions on the setup script if you're confused how to answer any of the questions, for details about command line arguments, or you would prefer to use a properties file instead of interactive mode.
Verify the Installation#
After the successful completion of setup process, verify the system health.
Log in to Text User Interface (TUI)#
Begin configuration by accessing the TUI with the following command:
jans tui
Full TUI documentation can be found here
If you have selected casa during installation you can access casa using urlhttps://<host>/jans-casa
Enabling HTTPS#
To enable communication with Janssen Server over TLS (https) in a production
environment, Janssen Server needs details about CA certificate. Update the
HTTPS cofiguration file https_jans.conf as shown below:
Note
Want to use Let's Encrypt to get a certificate? Follow this guide.
- Open
https_jans.conf
sudo vi /etc/httpd/conf.d/https_jans.conf
- Update
SSLCertificateFileandSSLCertificateKeyFileparameters values
SSLCertificateFile location_of_fullchain.pem
SSLCertificateKeyFile location_of_privkey.pem
- Restart
httpdservice for changes to take effect
sudo service httpd restart
Uninstall#
Uninstall process involves two steps and removes all the Janssen Server components.
Note
For removal of the attached persistence store, please refer to this note.
- Delete files installed by Janssen
-
Remove and purge the
janspackage -
Use the command below to uninstall the Janssen server
sudo python3 /opt/jans/jans-setup/install.py -uninstall
Console output like below will confirm the successful uninstallation of the Janssen Server
This process is irreversible.
You will lose all data related to Janssen Server.


Are you sure to uninstall Janssen Server? [yes/N] yes

Uninstalling Jannsen Server...
Removing /etc/default/jans-config-api
Stopping jans-config-api
Removing /etc/default/jans-scim
Stopping jans-scim
Removing /etc/default/jans-fido2
Stopping jans-fido2
Removing /etc/default/jans-auth
Stopping jans-auth
Removing /etc/default/jans-client-api
Stopping jans-client-api
Stopping OpenDj Server
Executing rm -r -f /etc/certs
Executing rm -r -f /etc/jans
Executing rm -r -f /opt/jans
Executing rm -r -f /opt/amazon-corretto*
Executing rm -r -f /opt/jre
Executing rm -r -f /opt/node*
Executing rm -r -f /opt/jetty*
Executing rm -r -f /opt/jython*
Executing rm -r -f /opt/opendj
Executing rm -r -f /opt/dist
Removing /etc/apache2/sites-enabled/https_jans.conf
Removing /etc/apache2/sites-available/https_jans.conf
- Remove the linux package
Use the command below to remove and purge jans package
yum remove jans.x86_64
Successful removal will remove the Janssen Server package along with the removal of all the unused dependencies.
